Tuesday, July 31, 2012

Introducing 3toGo -a GSM Rewarding Scheme

3to Go Picture

Learn how I made N10,500 in six (6) days doing simple thing I once thought was rubbish maybe you can learn to do the same or even, better and make even better than I have made.


Well, to start with, I was introduced to a programme by a friend and the programme is called 3toGo. He said the day he started the programme, he made N1,500. You're surprised? Or, ask how? Well, I was amazed, too. But the truth is; the programme is real. Only that you will be the one to determine how much you earn.

What is the Programme All About?

Well, in a nut shell, 3toGo is a networking programme; a multi-level one for that matter. And like most other networking programmes, you need to propagate your down lines and it is upon your down lines that your success depends.

How to Gain Down Lines and Propagate it

Nursing your investment means propagating your down lines, you only need to bring in people and enroll them under you. And each head that enrolls under you gives you a head up in the progranmme and by this; your earnings grow!

What You Gain

The programme 3toGo is of two classes and they are:
1- Executive
2- Business

To join as an executive it costs N5,000 and each time you enroll someone under you, you get N1,000 commission while the other one, the Business Class costs N2,500 to join and each time you enroll someone, you get N500 commission. What's more! Depending on the class of the programme you enrolled for, you also get either, N1,000 or N500 commissions from each head someone that registered under you bring.


  • For example

  • You register Mr A and Mr A registered Mr B, C and D. So, each time Mr B, C and D also register people, you will get the same commission as Mr A that registered under you thus; if Mr B, C and D register one person each, Mr A gets N1,500 and you also get N1,500 as well -and that's what surprised me.


    To confirm it, I register my own account then, I register my brother with my money under me and I receive my commission for that. So, when I collected my money from him, I registered my mother under my brother's account and for that, my brother and I get N500 each and so far, precisely 6 days, I have made N5,500 from my brother. It was fun!
    How to Register
    The registration process is not so difficult. You only need to pay either N5,000 or N2,500 to a bank account and afterwards, you will send your payment details to a mobile number to complete your registration.


    Download the PDF eBook that is attached here or below to further understand the programme. Within the eBook, you will learn more about the programme and how you probably could make a huge amount of money from the programme.

    Download 3toGo
    I hope you are able to make use of this! Remember, those who make haste while the sun shines relaxes while it sets. Act now by taking the risk as I have and you never regret it because not taking risk at all is even more risky.


    If you have any further questions or need any assistance, Contact Me via this link. Please fill in your mobile number and a valid email address in their appropriate boxes while contacting me.

    Share And Interact:

    Friday, July 27, 2012

    How to Use your Nokia Phone as A Modem

    Connect your PC to the internet using your Nokia phone as a modem by following these simple steps. Connect to the internet to browse and download unlimited files within few minutes.


    Nokia Phone Modem


    Verily, there are several ways by which you may access or connect your PC to the internet and browse or download unlimited files from the internet using the PC, however, not everybody has got the ability, either financially or technically, to connect their PCs to the internet and start browsing.

    Meanwhile, this article explains simple steps you may follow to set up your phone as a modem and connect it to your PC for internet access.

    Materials Needed for the Connection

    Please, don't forget that this article discusses how to use your Nokia phones as modem with which you may connect your PC to the internet. How to do the same with some other phones would be discussed in later posts on this blog; Aryk Enterprise.


    Below are the stuffs you need for the connection:

    1- Your PC, laptop or desktop
    2- Nokia PC Suite (Installed on your PC)
    3- A Nokia phone (That has at least, one of these connectivity facilities: Cable or cord, Bluetooth and or, Infrared)
    4- One of these connectivity materials: USB cord/cable, Bluetooth for PC (In-built or detachable) and Infrared
    5- Follow the instructions given below or, better still; know a better way to connect your phone to the PC.

    How to Connect your Nokia Phone to your PC

    To connect your Nokia phone to the PC, you must have already installed Nokia PC Suite programme on the PC and then;


    1- Lunch the Nokia PC Suite programme and click on the unidentified phone image that appears on the left.
    2- Select the type of connection you wish to use, either, Bluetooth, USB Cable or Infrared
    3- The next page displays the list of the available phones meanwhile, you must have make ready, the phone by switching on its Bluetooth or connected it to the PC via USB Cable. Once displayed, select the phone you wish to connect.
    4- The next page confirms that the connection is successful if the connection was well established.
    Then, go back to the normal Nokia PC Suite screen. By now, the unidentified phone image should have changed to your phone image(If you are using the latest Nokia PC Suite).

    Now, locate the Nokia Connectivity icon by locating the image below on the PC Suite programme;


    Nokia Phone Modem

    To this end, you have nothing to do. Just wait and watch how the programme identifies the network SIM in the phone. And connection would be established using the default settings from Network provider regardless of the configuration settings available on the phone. That's all.

    We do hope this helps you.


    For any comments or questions over this article please, use the comment box bellow. And if your questions is not about this article and needs our help over something related, Find Us on Facebook.com/saibven. Got any other info you want us discuss? Share it with us using the comment box!

    In case you are reading this from a feed, reader or an external link that prevents you from clicking links and others, visit www.saibven.blogspot.com now for the full access and more.


    Share And Interact:

    Tuesday, July 24, 2012

    Glo Special Offer for the Rahmadan Period

    Glo

    Listen to Hadiths, Quranic recitations, admonitions, Duas, Hadiths, Songs and more to add glamour and spice up the Rahmadan season!

    Globacom Nigeria introduces a Rahmadan Special Offer for muslim brothers and sisters. This special offer is intrduced by Glo to spice up the Rahmadan season for all the muslim brothers and sisters to make observing the on-goin fasting period more enjoying.

    This special package makes it possible for muslims to subscribe and listen to Hadiths, Quranic recitations, admonitions, Duas and more.

    You may subscribe to receiving the daily SMS on Ramadan Hadiths @ N100/30 days (Period of Rahmadan). This SMS Offer is valid only for the Ramadan period however, you may continue to enjoy the service even after Rahmadan if you subscribe to the service via the IVR system.

    Subscribe to The IVR system. The IVR Islamic Portal system gives customers the opportunity to call the IVR number, 77020 and listen to Quranic recitations, Duas, praise songs and more @ just N25/week and N5/minutes.

    Using the service, you may also dedicate any Qunut, Dua, Hadith, Adh Kar or Islamic song to your loved ones along with your personalized message.


    How to Subscribe to Daily Islamic SMS & IVR
    S/NServiceSubscription CodePriceUnsubscription Code
    1SMS AlertText "SALAM"
    to 77020
    N30/ 30 daysThis stops automatically
    after Rahmadan
    2The IVR SystemDial; 77020
    to subscribe
    @ N25/week;
    Browsing: N5/min
    Press 9 at any
    time while listening


    For any comments or questions over this article please, use the comment box bellow. And if your questions is not about this article and needs our help over something related, Find Us on Facebook.com/saibven. Got any other info you want us discuss? Share it with us using the comment box!

    In case you are reading this from a feed, reader or an external link that prevents you from clicking links and others, visit www.saibven.blogspot.com now for the full access and more.


    Share And Interact:

    Wednesday, July 18, 2012

    How to Back Up your Phone Content on PC

    Nokia Content Copier

    How to back up your phone content on PC using Nokia Content Copier in case of theft, loss of data or corrupt phone or storage memory.

    In case of theft, loss of data, corrupt phone memory or any other possible way you may loss those data stored on your phone memory, it is advised that you back up your data, especially; your phone contacts and messages. While there several ways you may back up your phone data, there’s one specially suitable for Nokia phones –Nokia content copier!

    Nokia content copier is one of the aids Nokia PC Suite can do you. You can use Nokia content copier to back up the content of your Nokia phones to be restored later on the phone or on another compatible Nokia phone. The process requires a connection between your PC and your Nokia phone either via Bluetooth, infrared or a USB Cable.


    How to Copy your Phone Content Using Content Copier

    Before you can be able to copy the content of your Nokia phone using Nokia Content copier, you need to have Nokia PC Suite installed on your PC. Once you have installed the PC Suite on the PC, lunch the Nokia PC Suite programme on the PC. Then, connect the phone to the PC using any of the connectivity means available to you.

      How to Connect your Phone to Nokia PC Suite

    To connect your phone to Nokia PC Suite;

    1- Lunch the Nokia PC Suite programme and click on the unidentified phone image that appears on the left.
    2- Select the type of connection you wish to use, either, Bluetooth, USB Cable or Infrared 3- The next page displays the list of the available phones. Select the one you wish to connect. 4- The next page confirms that the connection is successful if the connection was well established. 5- Then, go back to the normal screen. By now, the unidentified phone image should have changed to your phone image.

      For a detailed info, check How to Connect your Phone to your PC Using Nokia PC Suite

    How to Back Up your Phone Content on the PC

    Once you have successfully connected your phone to the PC;


    1- Click on the BackUp icon 2- Select the content you wish to back up 3- Then, click the green mark to begin the operation 4- The last page displays the notes on the operation

    And that’s all. You may check the image below for clearer view.

    Nokia Content Copier
    We hope you find this very useful.

    Share And Interact:

    Tuesday, July 17, 2012

    How to Connect your Phone to your PC Using Nokia PC Suite

    Nokia PC Suite is a Nokia phone manager that is being run on the PC. With Nokia PC Suite, you can accomplish most things you usually do on your Nokia phone via your PC using Nokia PC Suite. You can initiate calls, read, create and send messages, create and edit contacts, install phone applications, save, delete and edit files and many more.


    How to Connect your Phone to Nokia PC Suite
    To connect your phone to Nokia PC Suite; you must have installed the Nokia PC Suite on your computer then, you can follow the steps below:

    1-      Lunch the Nokia PC Suite programme and click on the unidentified phone image that appears on the left.
    2-      Select the type of connection you wish to use, either, Bluetooth, USB  Cable or Infrared
    3-      The next page displays the list of the available phones. Select the one you wish to connect.
    4-      The next page confirms that the connection is successful if the connection was well established.
    5-      Then, go back to the normal screen. By now, the unidentified phone image should have changed to your phone image.

    By now, you can explore your phone content on the PC and do many other things you usually do on the phone via your PC.

    See the screenshot below or check the image on our facebook fan page here and download for proper viewing.

    Nokia PC Suite Connection

    We hope you find this article very useful.


    For any comments or questions over this article please, use the comment box bellow. And if your questions is not about this article and needs our help over something related, Find Us on Facebook.com/saibven. Got any other info you want us discuss? Share it with us using the comment box!

    In case you are reading this from a feed, reader or an external link that prevents you from clicking links and others, visit www.saibven.blogspot.com now for the full access and more.


    Share And Interact:

    Saturday, July 14, 2012

    Glo GPRS Specific Configuration Settings For China Phones

    Airtel SettingsHow to configure your itel, techno, Protech and other china phones for GPRS to browse and access the internet with your Glo line.

    If you use china phones or know more about china phone, you should have known that most china phones don't support the OTA, automatic configuration settings for now therefore, to browse the internet you need to manually configure your phone.

    How to Configure Glo GPRS Settings on China Phones

    To configure any phone with GPRS Settings, you need to know the network GPRS Settings parameters. Here, we are going to share with each other, how to configure Glo GPRS settings on china phones.
    If you use china phone or wishes to configure a china phone to browsing the internet with Glo, here is how-to;
    Press Menu » Internet (Some phones, Services) » Data Account » GSM/GPRS
    Then, edit any of the predefined access points on the phone or, add a new access point on it.

    Glo GPRS Settings for China Phones
    FieldInput
    Account NameGlo Direct
    APNglosecure
    User Nameweb
    Passwordgprs
    AuthenticationNormal
    ***Please note that the access point parameters given above is a pay as browse plan and you cannot use it for glo free browsing.

    Now, if you have successfully created a Glo GPRS access point on the phone by following the directives above, before your settings can take effect on the phone, you will have to create another web account on the phone by following the steps that are explained hereunder, too.
    On the phone, go to Menu » Internet (Some phones, Services) » WAP » Settings
    On the screen that appears, you will see the list of the available web accounts. Edit any of the web accounts or add a new web account using the info on the table below:

    Glo Web Acc Settings for China Phones
    FieldInput
    Account NameAryk Ent/Glo
    Homewww.facebook.com/saibven
    Data AccountGlo Direct (Select the Access Point
    you created above
    Cannection TypeGPRS
    User Nameweb
    Passwordgprs


    And by now, if the china phone truly supports the browsing facility, you should be able to browse the internet if you have saved the settings as created.
    We do hope you find a use for this!


    For any comments or questions over this article please, use the comment box bellow. And if your questions is not about this article and needs our help over something related, Find Us on Facebook.com/saibven. Got any other info you want us discuss? Share it with us using the comment box!

    In case you are reading this from a feed, reader or an external link that prevents you from clicking links and others, visit www.saibven.blogspot.com now for the full access and more.


    Share And Interact:

    [SOLVED] Unfortunately, Clock has stopped

    When I upgraded my xperia ray from CM7 to CM9(FXP128), I was greeted by the message 'Unfortunately, Clock has stopped' whenever the phone started and anytime I touched the Clock widget. Apart from being annoying it meant I couldn't set my alarms so this became a priority one issue :-)

    I opened the Terminal Emulator and typed:

    $ su 
    # logcat

    Then I held 'Volume down' (a.k.a. Ctrl) and 'c' to stop the output. I scrolled a bit up in the output and found a line that said:

    E/SQLiteOpenHelper( 5231): Couldn't open alarms.db for writing (will try read-only): E/SQLiteOpenHelper( 5231): android.database.sqlite.SQLiteException: Can't downgrade database from version 7 to 5

    OK, so this is where it's breaking. I wasn't really interested in finding out what should the proper combination of ownership/permissions for the file as I didn't really trust it would end just here, downgrading database version offers a range of situations that can go wrong. And since I don't really care for my past alarm clock times, I got rid of the old database:

    # cd /data/data/com.android.deskclock/databases 
    # mv alarms.db alarms.db.bak 

    Problem solved.

    Thursday, July 12, 2012

    Opera handler 4- Download Editable Opera Handler with NotePad

    If you need an opera handler or editable opera that connects you to the internet using free browsing cheat for all networks, here is one. All you need to do is do the download and start surfing the internet free! Though, the opera handler is an older version of opera handler, but it is loaded with many functions and features that even, most of the latest opera handler lacks.

     Download Opera 4 Handler

    Features of this Opera Handler

    1- All Pages Proxy/Tweak Settings: this opera handler makes it possible for you to modify the proxy, tweak, host and http settings of your tweak settings on any page of the opera making it possible for you to change or modify your tweak settings while using the opera handler especially; when you experience server down time.  
    2- Multiple Copy Support: using this opera handler, you can copy multiple texts while browsing and paste them anywhere within the opera handler however, you can only paste your last copied text anywhere on the phone.

    3- Direct Jar Download: many opera handler users would prefer this feature. This feature lets you download within the opera handler without redirecting you to the phone's native web browser -this feature helps you browse and download absolutely free of charge! Please note that the particular feature of this opera handler mentioned above is phone dependent. Above are the few from many beautiful features of this opera handler. We hope you find it useful.

     Download Opera 4 Handler

    Share And Interact:


    Tuesday, July 10, 2012

    MTN Specific GPRS Configuration Settings For China Phones

    MTN China Phones Settings

    How to configure your itel, techno, Protech and other china phones for GPRS to browse and access the internet with your MTN line.


    Just in case you use china phones or have someone that uses china phones and wishes to configure it for browsing the internet using your MTN line, here is how you will go about it.
    As known that most china phones, for now, do not accept automatic GPRS configuration settings therefore; you need to manually configure them and input the GPRS settings before they can browse and access the internet, below you will learn how to do it.

    How to Configure MTN GPRS Settings on China Phones


    To configure any phone with GPRS Settings, you need to know the network GPRS Settings parameters and in this case, it is MTN in focus.
    Now, to configure the phone for MTN GPRS settings; Press Menu » Internet (Some phones, Services) » Data Account » GSM/GPRS

    Then, edit any of the predefined access points on the phone or, add a new access point on it.

    MTN GPRS Settings for China Phones
    FieldInput
    Account NameMTN Access
    APNweb.gprs.mtnonline.net
    User Nameweb
    Passwordgprs
    AuthenticationNormal


    Now, if you have successfully created an MTN GPRS access point on the phone by following the directies above, you have to create another web account on the phone by following the steps that are explained hereunder, too.
    On the phone, go to
    Menu » Internet (Some phones, Services) » WAP » Settings

    On the screen, you will see the list of the available web accounts. Edit any of the web accounts or add a new web account using the info on the table below:

    MTN Web Acc Settings for China Phones
    FieldInput
    Account NameAryk Ent/MTN
    Homewww.facebook.com/saibven
    Data AccountMTN Access (Select the Access Point
    you created above
    Cannection TypeGPRS
    User Nameweb
    Passwordgprs


    And by now, if you have saved the settings, the phone should now be able to browse the internet except that the phone does not support the facility. We do hope you find a use for this!


    Share And Interact:

    Tuesday, July 3, 2012

    Nokia PC Suite- Info And the Uses

    With Nokia PC Suite installed on your computer, your Nokia phones and the PC becomes one!

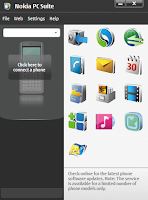
    Nokia PC suite is is a programme; a form of Nokia phones manager that you can install on your computer and with which you can do so much more with your nokia phone using your computer.

    Nokia PC Suite makes it possible for you to connect your nokia phones with your computer using either cable, infrared or bluetooth connections and with this, you can access virtually, all the files on your nokia phone using the PC. You may copy files from the PC to your nokia phone or from the phone to the PC and much more.


    Nokia PC Suit

     Things You Can Do with Nokia PC Suite

    Amongst numerous operations you carry out on your phone using nokia PC Suite, below are some of them:
    1. Back Ups Just in case of any unexpected accident like thieft or lose of documents, you may decide to syncronise and back up some of the files on your nokia phones on your PC so that you may access them later.
    Calender, contacts, messages, pictures, videos and other multimedia file, notes amongst others can be backed up on the system
    For easier and safer access, you may decide to do your back ups weekly.

    2. Messages Directly from your PC screen, you can send and recieve messages from the the phone. View, create, and send messages as though you are on your phone

    3. Multimedia Conversion and Transfer Once your nokia phone is connected to your PC via nokia PC Suite, the PC Suites recognises and detects all the videos on your nokia phone and the PC Suite may convert them to the format and size your nokia phone plays.

    4. Application Installations Using the PC, you can also install applications (that are compatible with your nokia phone) that are available on the PC to on your phone without stress.

    5. Updates Also, though, this involves internet connectivity, you may also update your phone softwares using the Nokia PC Suiite on your PC thereby giving your phone a new look with much more functions giving you so much more to do with your nokia phone.

    6. One Touch AScccess to the Internet! This another beautiful benefit of having nokia PC Suite installed on your PC! With nokia PC Suite installed on your PC, you may connect your PC to the internet using the internet connection on your phone. Isn't this cool?

    You may download Nokia PC Suite from any of the download page below:

    Nokia PC Suite- softpedia Download Page

    www.saibven.blogspot.com now for the full access and more.

    Share And Interact:

    Sunday, July 1, 2012

    Airtel Configuration Settings- How-to

    Airtel Settings

    Configure your phone for browsing the internet with your Airtel line either manually or automatically following the simple steps given within this article.

    Just in case you have been willing to configure your phone for browsing the internet with your Airtel SIM; line, within this article, you will learn how to manually or automatically configure your Airtel Line for browsing the internet.

    How to Setup your Airtel Line for Airtel INTERNET Access

    As earlier said, you may configure your Airtel line for browsing the internet on your phone either automatically or manually; all you need to do this are just some commands and parameters all to be set on your phone.

    The Airtel OTA, Automatic Configuration

    The OTA, automatic configuration is the first and simplest means to have your phone configured for browsing the internet and most of the Nigeria GSM networks support this form of configuration, though not all phones support this method.

    How the Airtel OTA, Automatic Configuration Works

    Although, with some mordern smartphones like Nokia S60 V5 (N97, 5800, E5, N96, E7, E6, C6) amongst others, it is not neccessary that you initiate OTA configuration settings by message or any means, once the service provider SIM card is inserted, the phone automatically looks for the available data services and downloads the settings and set them to their appropriate defaults.

    Meanwhile, with the other smartphones that do not have the functionality briefly explained above, you are either notified by SMS that your phone supports the OTA configuaration and the settings would be sent to your phone for you to save before you start browsing the internet. Or, initiate the OTA configuration by message.
    Initiating Airtel OTA, Automatic Configuration By SMS
    To initiate the Airtel OTA configuration settings by message send an SMS with the text "INTERNET" with your phone make and model to 232.

    For example, if you are using Nokia N70 and wants the Airtel Internet Configuration settings sent on it, your message in request for the settings should look like these;

    "internet nokia N70"
    and send it in an SMS to 232.

    Shortly afterwards, you should recieve the settings in an SMS and when the settings arrive, choose the option to save it. If you are prompted for a PIN, use 0 (zero) or, for a longer pin; key in 0000.
    Using Airtel Manual Configuration
    If your phone does not support the automatic configuration settings, you may follow the step by step instructions on how to manually configure your phone.

    To manually configure your phone for internet browsing, locate the configuration settings of your phone through the menu to settings and key in the parameters given in the table below in their appropriate field


    Airtel Internet Access Manual Configuration
    S/NFieldParameters
    1.APNAirtel Internet
    2.AP; Access Pointinternet.ng.airtel.com
    3.Data Bearer or TypeGPRS or Packet Data
    4.User Nameweb or gprs
    5.Password0000
    6.Home PageAnything e.g facebook.com/saibven
    7.Port8080
    8.AuthenticationNormal


    For further enquiries or assistance on how to activate the service, call customer care toll free on 131 for postpaid subscribers and 111 for pre-paid subscribers. You might consider contacting us using the comment box below this article for assistance.


    For any comments or questions over this article please, use the comment box bellow. And if your questions is not about this article and needs our help over something related, Find Us on Facebook.com/saibven. Got any other info you want us discuss? Share it with us using the comment box!

    In case you are reading this from a feed, reader or an external link that prevents you from clicking links and others, visit www.saibven.blogspot.com now for the full access and more.

    Share And Interact: